All a microphone does is convert sound waves into electric energy so that it can be recorded into a digital recorder, DAW (Digital Audio Workstation), or for a live performance or video production.
There are different types of microphones that transduce sound waves into energy in different ways.
A condenser microphone is a type of microphone that is commonly used in professional sound studios. Many top voice-over artists choose condenser microphones because they can capture the full range of a voice. Condenser mics have a richness of sound that other types of microphones have difficulty matching.


Condenser Microphone Technology:
A condenser microphone uses two charged metal plates that form a capacitor. The two plates are the diaphragm and the backplate. When the sound-wave hits the microphone’s diaphragm the waves vibrate inside the diaphragm and the backplate remains stationary. The distance between the backplate and the diaphragm impacts the capacitance (voltage). The diaphragm responds to changes in pressure of the sound waves.
Capacitance is the ratio of the amount of electric charge stored on a conductor to a difference in electric potential. There are two closely related notions of capacitance: self capacitance and mutual capacitance. Any object that can be electrically charged exhibits self capacitance.
Wikipedia
The plates are separated by a dielectric medium which can be made of glass, paper, an oxide layer or just air. A dielectric medium placed within an electric field does not allow electric charges to flow through the material as they do in an electrical conductor. This causes dielectric polarization.
The impedance converter circuit maintains the charge of the capacitor.
Deep dive on how condenser microphones work:
OK, this is getting into the weeds a little and it is a little beyond most people’s need to understand. But let’s get into the math.
V = Q x C
V – Voltage between two plates
Q – Electric charge between two plates
C – Capacitance of a capacitor (the ability to store a charge)
The SI unit of Capacitance is Farad (F).
In order for a condenser microphone to work it needs power. Without power, the capacitor will not function properly. Without power, the microphone capsule will not be polarized. The impedance converter, circuit, and preamp (if built into the mic) also require power. A condenser microphone must maintain a fixed charge.
Phantom Power
Phantom Power is the best external power source for condenser microphones. Phantom power supplies direct current to the condenser mic to run its circuit. A battery can provide phantom power but usually, it comes from an audio interface or mixer. Phantom power is generally 48 Volts. If you have an audio interface, mixer, or Podcast All in One device like the Podtrak P4 or Rodecaster Pro, then you probably noticed a button or switch that turns on or off phantom power.
In order to use a condenser microphone you need an audio interface that supports phantom power.
Examples of budget Condenser Microphones:
-
Podcast Condenser Microphones
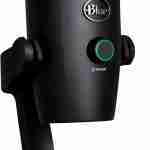
Blue Yeti Nano Premium USB Mic for Recording and Streaming
$99.99 Check Price on Amazon -
Podcast Condenser Microphones
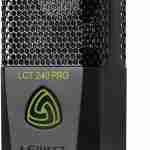
Lewitt LCT-240-PRO Compact Condenser Microphone
$149.00 Check Price on Amazon -
Podcast Condenser Microphones
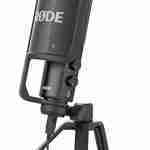
Rode Microphones NT-USB USB Condenser Microphone
$169.00 Check the Price on Amazon -
Podcast Condenser Microphones
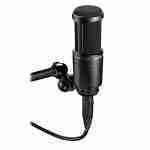
Audio-Technica AT2020USB+ Cardioid Condenser USB Microphone
$99.99 Check Price on Amazon
Examples of high-quality Condenser Microphones:


Pros and Cons of using a Condenser Microphone to record your podcast:
Pros
- Smaller size due to no coils or magnets
- Lighter due to no coils or magnets
- Respond to wider frequency range
- More natural voice quality
Cons
- Requires external power source
- Relatively more expensive
- Cheap mics can generate noise
- Need a quiet recording space
- May need sound treated room
- Not the best mic for a beginner
Is a condenser microphone good for podcasting?
Condenser microphones got a bad rap from many indie podcast coaches and podcasters who podcast about podcasting. Despite the bad press on condenser podcast microphones, a lot of high-profile and professional podcasters use condenser mics. Rob Walsh from Libsyn has used a Blue Yeti for years.
The fact that condenser microphones capture a more dynamic range is what makes them appealing to many podcasters. But it also means that it captures more background noise.

This is why it is important for podcasters that use Condenser Microphones to have a treated recording space.
How to treat a room for your Condenser Microphone?
The first step to treating your recording space is to select the right room. You want the quietest room possible. Background noise like street noise and hot water tanks and kids…
Next, you will need to look into sound absorption and diffusion.
You can buy sound absorption panels and diffusion panels to make your room sound more like a recording studio. If you don’t have the budget for professional sound treatment you can DIY some sound panels or go with a Dynamic Microphone which will be less sensitive.
DIY Sound absorption panels:
You can make your own panels using some scrap wood, Rock Wool insulation, and some fabric. There are a ton of Youtube videos on this topic. Moving blankets (also called acoustic blankets?) can also be used to absorb the sound and eliminate some reverb.
Bookshelves with lots of books on them can act as a diffusion panel as well. Anything with variable surface area is good to break up the sound waves. The worst sound is from flat reflective surfaces.
Even if you choose a Dynamic Microphone, it is a good idea to treat your room to eliminate reverb and make your recordings cleaner. You can use post-production audio tools to fix the audio but it is way better to start with good audio.